GRAB BLINKIE

I STALK


TUBE SITES


Sunday, March 31, 2013
Lady Lesia Ptu Tut

Lady Lesia Tutorial
using the beautiful art of Bonnies-Creations.
and a ptu scrap kit by Tiny Turle Designs.
You can find Bonnies Art -Click Here
You can find Kits by Tiny Turtle - Click Here
----------------
To Get Started You Will Need The Following:
Paintshop Pro- I used X4 (but any should work)
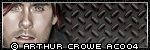
Tube Choice- as listed above
Scrap kit- As listed Above
Template- Temp101- Click Here
Plugins-Xero(Porcelain & bad dream)
----------------
Open your template, delete credits layer and hide your background layer. Were going to start from the bottom and work our way upward, remember to rename any new layers that you might end up duplicating so when i speak of them later you'll know which layer.
Go on down to raster5 layer-selections-select all-float-defloat-open ele8(paper)-copy and paste as new layer-selections-invert-delete-deselect. Merge rasters 9,8,and 7 together-selections-select all-float-defloat-open ele26(paper)-copy and paste as new layer-selections-invert-delete-deselect-add drop shadow(0, 0, 100, 5)-add new raster layer-open ele62-resize about 30%-copy and paste.
Go up to raster4-selections-select all-float-defloat-open ele12(paper)-copy and paste as new layer-selections-invert-delete-deselect. Go up to raster 6-selections-select all-float-defloat-open ele28(paper)-copy and paste as new layer-selections-invert-delete-deselect-add new raster layer-open elements 80,81 & 82-resize all 3 about 65%-copy and paste-position to your liking. Click on raster2-selections-select all-float-defloat-open ele 27(paper)-copy and paste as new layer-selections-invert-delete-deselect-effects-plugins-penta-jeans(standard settings)-selections-float-defloat-open your tube choice(close up if you have)-copy and paste as new layer-position to your liking-selections-invert-delete-deselect-change settings to luminance(L)-Opacity 50-duplicate and change that layer to screen.
Click on raster 11-selections-select all-float-defloat-flood fill with your gradient(use colors that match your tag/tube)-adjust-add noise(fix to your liking)-deselect-add drop shadow(same settings as above). Click on raster3-selections-select all-float-defloat-open ele 26 again-copy and paste as new layer-selections-invert-delete-deselect. Click on raster10-selections-select all-float-defloat-flood fill with your gradient-adjust-add noise(fix to your liking)-deselect-add drop shadow(same settings as above)-add new raster layer.
Open elements 42,43,52,& 54-resize all to 75%-copy and paste-position to your liking-Add new raster layer. Open ele64-resize about 60%-copy and paste-position to your liking-Add new raster layer. Open ele105-copy and paste-position to your liking-add new raster layer. Open your tube choice-resize if needed-and position in the middle or to your liking. Merge all layers together, if you need to resize your tag now is the time to do so.
Go up to effects-plugins-Xero-porcelain(all colors to 0, change the strength to 73)-Xero-Bad Dream(128, 79, 0, 0, 0, 15, -9)- Add all correct copyrights-your text and your all done.
--------------
DO NOT CLAIIM THIS TUT AS YOUR OWN AS I'VE CREATED IT AS CT FOR BONNIES-CREATIONS.
DO NOT STEAL, RIP OR CHANGE ANYTHING WITH THE ABOVE TAG, AS IT WAS NOT CREATED FOR YOU OR THAT REASON. IF YOU USE MY TUT FOR ANY OTHER REASON THAN PU PLEASE LINK BACK TO MY BLOG.

Subscribe to:
Post Comments
(Atom)


0 comments:
Post a Comment